Hello again all,
As discussed here is the 2nd installment , Lander 2 is well underway , don't know if I should super detail it.
The ramp open to the back & is kept in place with a magnet. Don't know about the 2 balls on the side.
Don't know If I'll undercoat in Black+ Grey dry brush or Grey + Black wash…. decisions decisions….
The ATV's are both ready and I'll put them in the next post so as to make my posts more user friendly, i.e. easier to find stuff as sometimes even I have to search a lot to find a particular post.
As always enjoy & may you be inspired.
Z
Anything that has to do with Scifi / Fantasy 15 and 28mm wargaming. This includes painting,scratch building,terrain & gaming
Total Pageviews
Saturday, 2 July 2016
Tuesday, 28 June 2016
Scratchbuilt Lander Mark 2, Engines & ATV Part 1
Hello again all,
Just thought to share my current projects which I'm working hard to finish before I end up lethargic due to the increasing local temperature which is already 30/31 deg C.
I'm always on the lookout for interesting shapes which can be transformed into models.
Having finished the first Lander, see the following links, I decided to build another large one.
http://castrarunis.blogspot.com.mt/2015/09/scratchbuilt-lander.html
http://castrarunis.blogspot.com.mt/2015/09/scratchbuilt-lander-part-2.html
http://castrarunis.blogspot.com.mt/2015/09/the-lander-is-finished.html
The Lander is basically the ink cleaning tray from an HP inkjet printer, very messy to clean but well worth it as it has a great shape. The engines are simply upturned coffee machine pods and can easily go hand in hand with Warmonkey's " Need Space Engines Post " except they're free ( apart from the strange looks people give you when they see you collecting things which are normally thrown away :):):) ).
They have nice detail to them , which should look good when dry brushed.
I also used them to build the tank/compressor/generator model in the pics , so they very versatile.
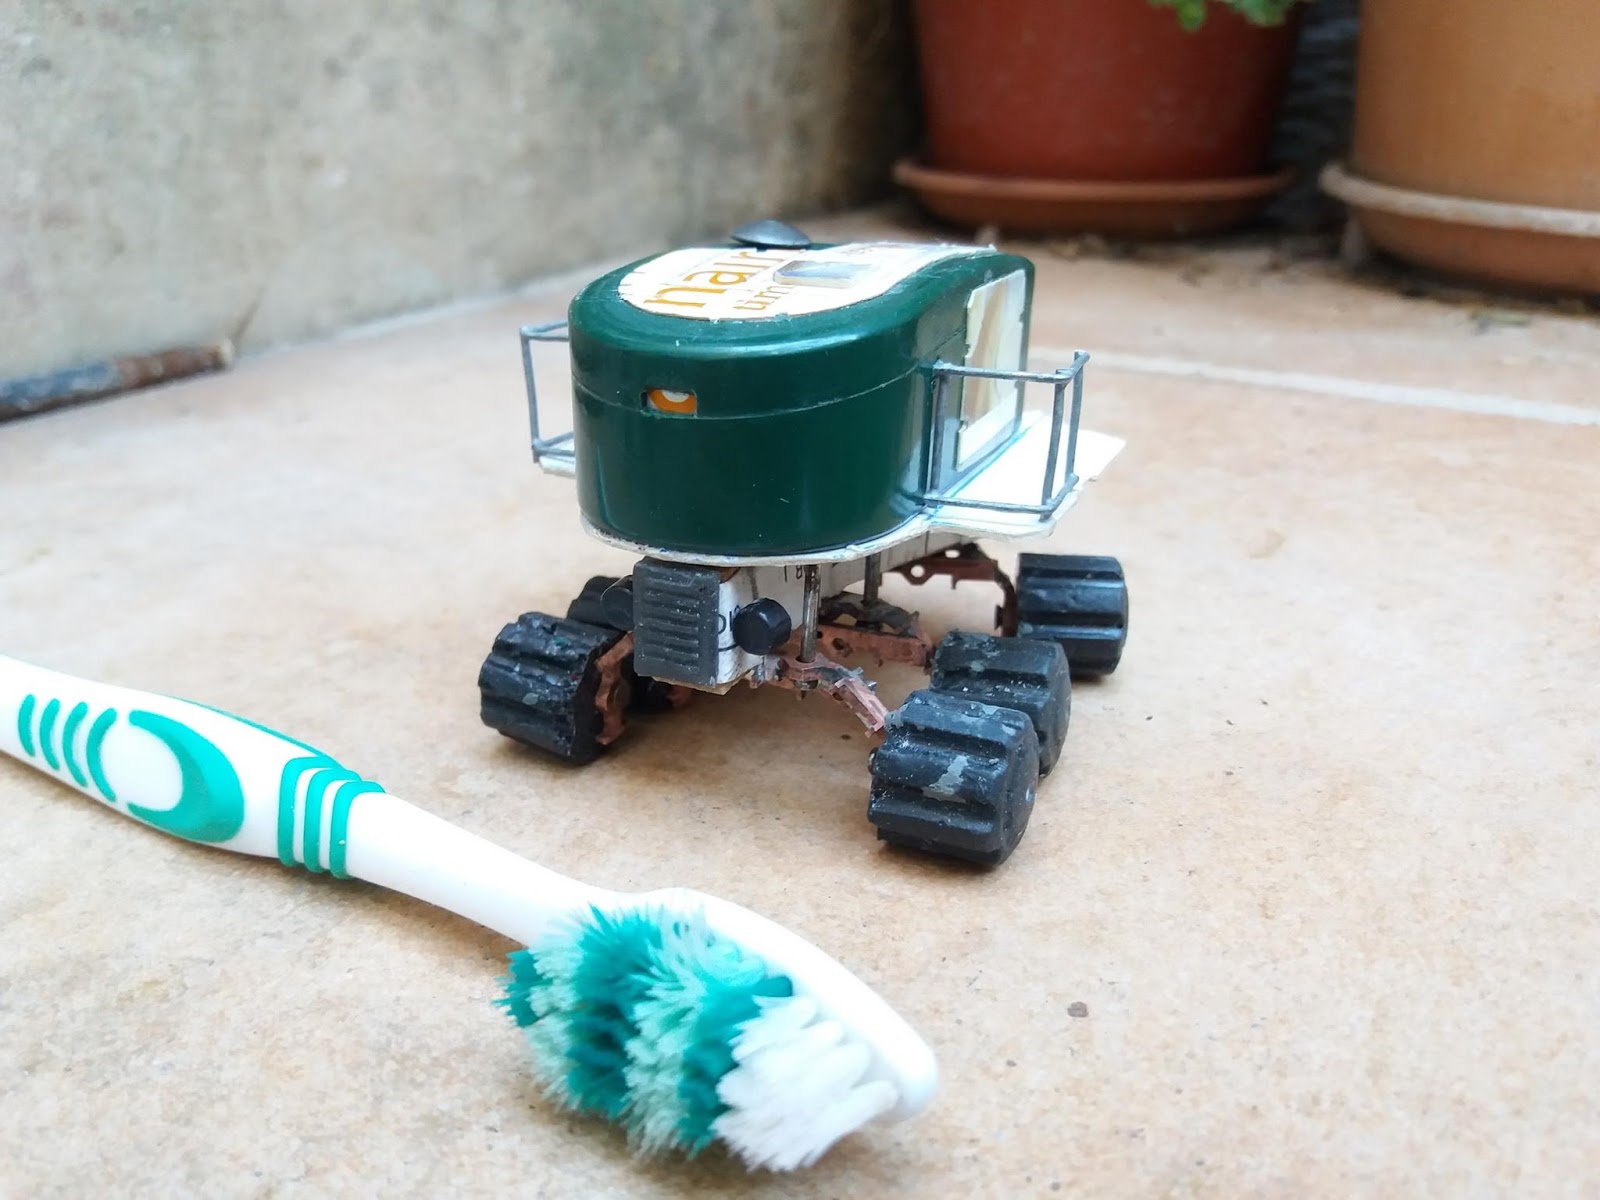
As part of my Frontier world / Spaceport setting - The ATV is simply a Christmas lights controller ( use one year only Made in China type ) , embellished with embossed card detail as I had shown in my previous post
http://castrarunis.blogspot.com.mt/2014/04/scratchbuilt-hover-vehicles.html
The axles are copper pieces which are bent & soldered into place ( this would need skilled & /or adult supervision) , nail suspensions, wire wound springs & last but not least wheels made from a press mould I made off a marker cap ( chopped off short & filed down ). The toothbrush is for scale & is not needed.
Obviously Esmeralda our Dog decided to come around & have a good sniff.to make sure that all is OK ....
Hope you like them & as always, may you be inspired.
If you need help , ideas etc , mail me on zrunelord@gmail.com
Z
Just thought to share my current projects which I'm working hard to finish before I end up lethargic due to the increasing local temperature which is already 30/31 deg C.
I'm always on the lookout for interesting shapes which can be transformed into models.
Having finished the first Lander, see the following links, I decided to build another large one.
http://castrarunis.blogspot.com.mt/2015/09/scratchbuilt-lander.html
http://castrarunis.blogspot.com.mt/2015/09/scratchbuilt-lander-part-2.html
http://castrarunis.blogspot.com.mt/2015/09/the-lander-is-finished.html
The Lander is basically the ink cleaning tray from an HP inkjet printer, very messy to clean but well worth it as it has a great shape. The engines are simply upturned coffee machine pods and can easily go hand in hand with Warmonkey's " Need Space Engines Post " except they're free ( apart from the strange looks people give you when they see you collecting things which are normally thrown away :):):) ).
They have nice detail to them , which should look good when dry brushed.
I also used them to build the tank/compressor/generator model in the pics , so they very versatile.
As part of my Frontier world / Spaceport setting - The ATV is simply a Christmas lights controller ( use one year only Made in China type ) , embellished with embossed card detail as I had shown in my previous post
http://castrarunis.blogspot.com.mt/2014/04/scratchbuilt-hover-vehicles.html
The axles are copper pieces which are bent & soldered into place ( this would need skilled & /or adult supervision) , nail suspensions, wire wound springs & last but not least wheels made from a press mould I made off a marker cap ( chopped off short & filed down ). The toothbrush is for scale & is not needed.
Obviously Esmeralda our Dog decided to come around & have a good sniff.to make sure that all is OK ....
Hope you like them & as always, may you be inspired.
If you need help , ideas etc , mail me on zrunelord@gmail.com
Z
Gorkamorka Scratchbuilt Ork Card Vehicles
Hello all,
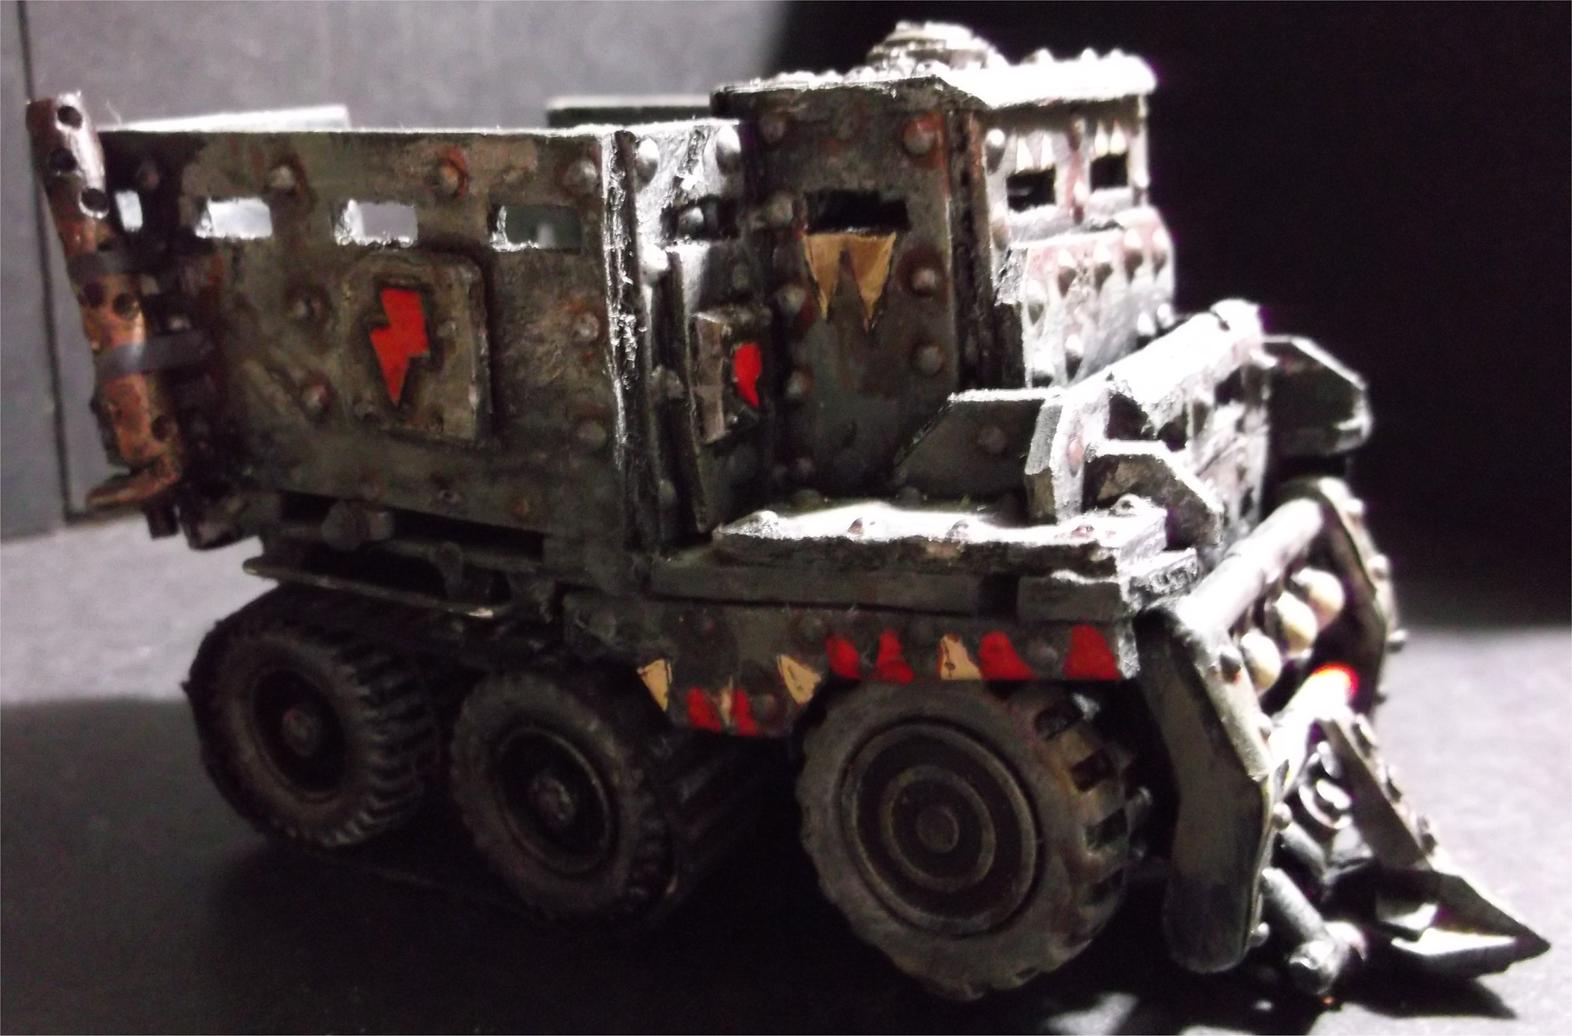
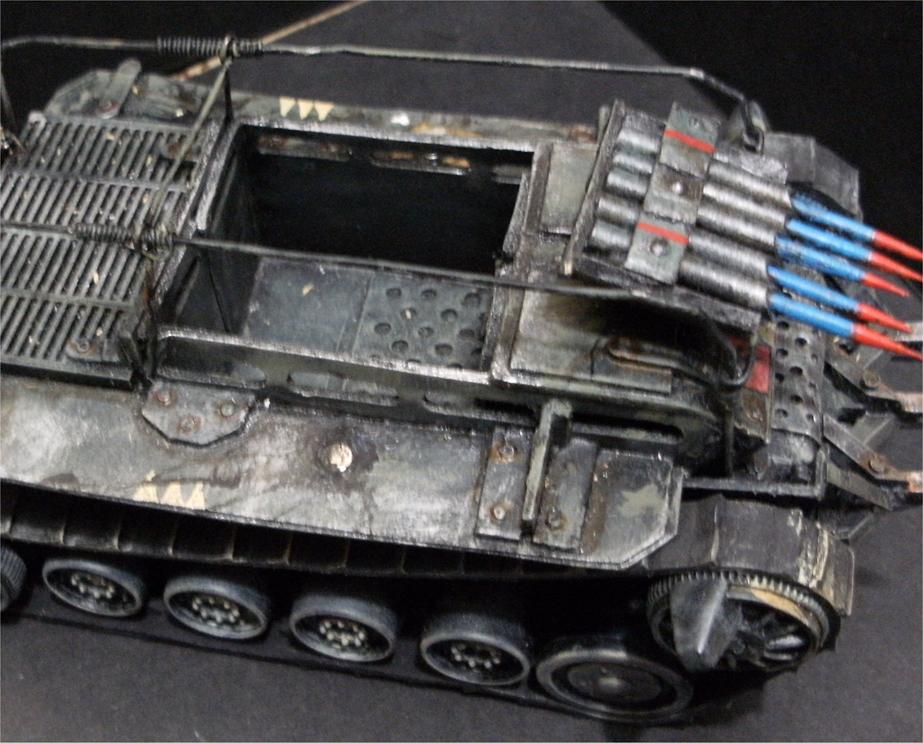
These are my Gorkamorka Ork Card Vehicles - Card,plastic sprues,GW parts & minis,toy parts etc.
Gorkamorka gives you free rein when building vehicles & you can go as wacky as you like.
The Harpoon , Speargun & Grabba claw are made from sprue,toothpicks,card & wire.
There's also the GW new truck.
If only GW in their infinite wisdom (??!!!!) would have done with Gorkamorka & Necromunda ( my 2 favourite games ) what they did with SpaceHulk instead of having wasted it on Dreadfleet !!
.I think they would find a good market for them.
I think one can easily convert Gorkamorka to 15mm
Enjoy
Z
These are my Gorkamorka Ork Card Vehicles - Card,plastic sprues,GW parts & minis,toy parts etc.
Gorkamorka gives you free rein when building vehicles & you can go as wacky as you like.
The Harpoon , Speargun & Grabba claw are made from sprue,toothpicks,card & wire.
There's also the GW new truck.
If only GW in their infinite wisdom (??!!!!) would have done with Gorkamorka & Necromunda ( my 2 favourite games ) what they did with SpaceHulk instead of having wasted it on Dreadfleet !!
.I think they would find a good market for them.
I think one can easily convert Gorkamorka to 15mm
Enjoy
Z
Subscribe to:
Posts (Atom)